Friday, September 25, 2020

Survey of the Field


This past week and a half I’ve been packing and moving to a new apartment in between my job and school and I could not get much actual progress done with photogrammetry or 3D printing and this week I was the one who was unable to meet with Emma Dietrich due to how a packing time crunch. As such I will use this week’s blog post to present a survey of the field where I will showcase other projects already out there as well as papers which relate to my research.

                First and foremost, the “Florida History in 3D” project is similar to what I hope to accomplish on a smaller scale. Creating models which serve as a digital online exhibit that show cases local Florida history is the real pull of this project and is a great way to present a collection of artifacts that share the same story.

http://floridahistoryin3d.com/

                “Scan the World” is large project which seeks to present the world’s heritage in a massive online database and takes a grass roots approach where anyone can capture important cultural heritage objects in 3D and add it to the database with the use of their phone camera, but this project is also supported by many museums who digitize their collections into the database creating a database that has over 16,000 objects. The idea behind this project is the bring cultural heritage to the people with entire collections available online and are all free to download and print off replicas with the use of a 3D printer. This project really inspires my own as it makes cultural heritage more accessible and opens up a lot of options for 3D replication, although this is not always feasible for more 1:1 replications due to size restrictions.

 https://www.myminifactory.com/scantheworld/

“Preserving Rapid Prototypes: A Review” is a great source for understanding the current replication processes in the professional field. It breaks down the differences between material type as well as applications, and the operations of different printers. This source also showcases many different projects which have used a variety of rapid protype replications and the benefits of each which makes this source a great advocate for the replication field especially with cultural heritage objects for public use.

Coon, Carolien. “Preserving rapid prototypes: A review.” Heritage Science 4, no. 40 (22 November 2016).


The source listed below is a great source for detailing the uses of photogrammetry in the archaeological field in the case for survey purposes which allows for an accurate recording of an object at a particular point in time to allow research without the need to travel back out to the site again. This source also details the process of capturing an object with photogrammetry in the field.

McCarthy, John. “Multi-image photogrammetry as a practical tool for cultural heritage survey and community engagement.” Journal of Archaeological Science 43 (2014).


The goal for the upcoming week is to unpack quickly and get back on track with completing the project.

Friday, September 18, 2020

A Brick Wall

 This past week does not bring any interesting photos of progress as this week was mainly a brick wall to my project which will be the focus of this blog post. This week was really busy for Emma Dietrich over at FPAN so we could not trouble shoot my problems together or exchange photos, prints, or artifacts.

With this known, my goal for this week was to fix a previous problem I had last week where I built the dense point cloud and the back half of the model was not there due to the program reading other spatial data within the photobox other than the model itself which tells it I am not moving around the model and thus confusing the program with conflicting spatial dots. There are a few solutions to this problem with the most prevalent being “masking.”

Masking is a feature where Metashape takes a single photo and identifies all the spatial data it can from the single photo and then ignores it every time it comes up in every photo in my selected profile. This works well on a turntable because it blocks out the static background so Metashape no longer has conflicting spatial data due to the turn table. I spent a good deal of time trying to get this process to work but only had marginal success. A unique feature to Metashape is its ability to automatically detect and apply masks across the whole profile based off of one image, however I later found out that the small rubber ridges on my turntable make it difficult for this process to work as intended. I had every photo masked yet the photos would no longer align (the first step in building the point cloud that eventually becomes the 3D model) which is why this week is a brick wall.

The black negative portions of each photo is the data that is ignored because it matches my fully masked static background. Note the white lines that are not the actual model that create the confusion during the aligning process.

Every problem I tried to solve brought me marginal success only to be stuck again with another, very similar, problem. I took three entirely new photo groups with different settings, and I tried masking in different methods just in case it was the original photo group that was the problem.

I have, however, pathways the circumvent this problem for the upcoming week. I can buy more lights and actually move around the model; this would be the most time-consuming method. I could also go through every single image in my photo groups and apply an individual custom mask to each photo, this method would be time consuming due to the volume of photos but perhaps not as much as moving around the model. The third way would be to apply white poster board to the top of the turn table to get rid of the texture and repeat the steps I took this week and if any problems occur, then I can edit the masks to touch up any areas that would be confusing for the program.

My goal for next week is to move past this problem and finally construct a full 3D model so I can start learning the process that makes that model printable with another program called blender.

Friday, September 11, 2020

First Test Prints and Metashape Experience.


    This week focused on printing three test prints of artifacts as well as learning how to use Metashape on a normal household object to prepare for the actual five artifacts from the Sanford Museum. This blog will focus on the printing process as well my introduction and progress with Metashape.

                The printing process for 3D artifacts involves taking .STL or .OBJ files prepared in Metashape and Blender, which I will also detail those two processes later in the internship, and loading them into a 3D Slicer. To prepare the three artifacts for printing I load them into a series of slicers because each slicer, while they do the same task, each is traditionally accepted in the 3D printing community as having a feature they perform very well while the other features fall short. Therefore, loading the files into a variety of different programs allows for a greater control over the process as well as creating an easier workflow.

                Prusa slicer is the first slicer that I load each model into and add support beams on the model itself to make the model actually printable. I then export the test prints with supports into Chitubox, load them onto the build plate digitally and complete any hollowing and draining if the models are large enough to warrant it. Finally I export these files again into the Photon slicer which makes the file actually printable as a .pws file for my printer.

Photo of wax seal print with support beams

Once the models are printed I wear protective equipment to avoid resin toxicity and scrape the models and their supports into a vat of acetone to clean off any liquid resin residue. After agitating them in the acetone for approximately 10-15 seconds I dry them and transfer them to warm water to make the resin more pliable. After they models become more flexible I take an excato knife to cleanly separate the supports off of the model. This step takes great care and precision or else the printed replica will have moderate to severe support marring. Finally, once the models are free from their supports and they air dry, they are then placed under a UV light for five minutes to cure fully which not only hardens the model but makes it fully safe for handling.

Wax seal resin print top, and arrow head resin print bottom.

While the test prints and the printing process went by flawlessly this week, the process for learning and using Metashape did not. I watched a lot of tutorials on Metashape and used a test model to perform the operations. To begin I took photos from all around the model with approximately 75% overlap between each photo. Once I assembled the profile of images and loaded them into Metashape I aligned the photos forming the pictures below.

Image of the sparse point cloud

The image above shows a sparse point cloud of the model which, instead of loading all points, only loads certain points to give a quick idea of the shape of all scanned assets which makes the model easier to work with and delete unnecessary data. Once just the model was in frame I built the dense point cloud which made it evident that the operation was a failure as only the front half was rendered correctly while the back half was not. This means that the program was not tricked into thinking I moved around the model because the texture on the turn table gave it away. The next step forward is to take additional steps such as hiding the texture on the turn table and starting a process called masking which is supposed help with this turn table issue.


Image of the more resource intensive dense point cloud.


Friday, September 4, 2020

FPAN 3D Printing and Modelleing Internship Week 2


This past week was largely uneventful due to scheduling differences between Emma Dietrich from FPAN and myself, however we did manage to meet up to in order to exchange necessary files for the start of the internship while also laying out a tentative road map for the future. I see this blog as a review of our meeting but also a reflection on the many steps and failures I took to prepare for this internship this summer.

                Our meeting Thursday night on September 3rd involved the exchange of a few 3D models of certain artifacts that Emma already created with photogrammetry to test print. Doing so will allow us time to print them both in resin and filament early on in the project so we will have more time to compare the products from both without jeopardizing the time it will take to learn the photogrammetric process. At this meeting FPAN was gracious enough to allocate me a standard license for Agisoft’s Metashape which runs for 180$ and has become the industry standard for processing photogrammetry in order to ensure the best possible software to create these models. The plan for next week is to come together with our resin and filament prints as well as with five preliminary artifacts from the Sanford museum to begin the photogrammetric process of rendering them in 3D.

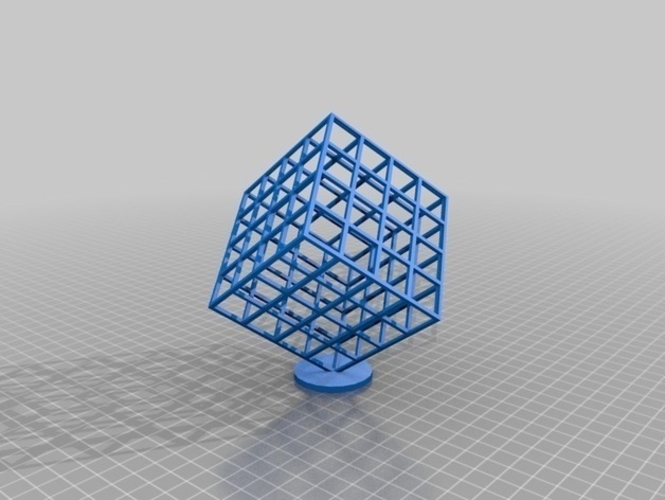
                This summer I spent the past few months acquiring a 3D resin printer and learning how to use it for this eventual internship with the intent of getting some of the learning bumps out of the way before the actual start of the internship. The picture below is an image of one of my first 3D prints that failed. It was intended to be a 3D lattice cube but failed to stick to the build plate and fell into the vat of resin and cured against the bottom FEP film that separates the resin from the UV light that cures and builds the model.


This is an image of the failed Lattice Cube test model

This is a rendering of what the Lattice Cube test model was intended to look like.

I also tried my hand initially at photogrammetry before failing spectacularly using bad technique, bad lighting and free software. The image below shows the image profile of my first attempt. The idea was to capture the golden warrior figure in 3D and soon found out that the photogrammetric program needs photos from points that require actually moving around the object instead of just turning it as the background is in part what allows the program to recognize the change in position between the photos and therefore create an accurate 3D model. My initial creation rendered the background into 3D based off of what the images showed but the golden model ended up being a blob with no real definition.

The background in the image would distract the program and cause the golden warrior pictures to overlay on each other creating the 'blob' while the rest of the scene rendered into 3D

                I learned soon, however, that the program can be fooled into thinking I was moving around the object by placing it in a photo box on a lazy Susan. This method allows the background to be indescribable to the program and the only point of reference to create the 3D model is the model/artifact itself.  This method also allows for even and easy lighting as well as preventing the need to constantly move the camera into 40 to 50 new points around the model.


The photo box and lazy Susan creates a scene free from noise and distractions allowing the program to only recognize the model in the image and therefore be tricked when it comes to movement around the model.

It is my goal in the coming days to try this method out using my newly acquired photo box and lazy Susan and learn to input these into Metashape while also printing the test models from FPAN. My initial work in the coming week for Metashape will be small detail-oriented models that I have lying around the house while I await the coming artifacts next week.