This past week was largely
uneventful due to scheduling differences between Emma Dietrich from FPAN and myself,
however we did manage to meet up to in order to exchange necessary files for
the start of the internship while also laying out a tentative road map for the future.
I see this blog as a review of our meeting but also a reflection on the many
steps and failures I took to prepare for this internship this summer.
Our
meeting Thursday night on September 3rd involved the exchange of a few 3D
models of certain artifacts that Emma already created with photogrammetry to test
print. Doing so will allow us time to print them both in resin and filament
early on in the project so we will have more time to compare the products from both
without jeopardizing the time it will take to learn the photogrammetric process.
At this meeting FPAN was gracious enough to allocate me a standard license for
Agisoft’s Metashape which runs for 180$ and has become the industry standard
for processing photogrammetry in order to ensure the best possible software to
create these models. The plan for next week is to come together with our resin
and filament prints as well as with five preliminary artifacts from the Sanford
museum to begin the photogrammetric process of rendering them in 3D.
This
summer I spent the past few months acquiring a 3D resin printer and learning
how to use it for this eventual internship with the intent of getting some of the
learning bumps out of the way before the actual start of the internship. The picture
below is an image of one of my first 3D prints that failed. It was intended to
be a 3D lattice cube but failed to stick to the build plate and fell into the vat
of resin and cured against the bottom FEP film that separates the resin from
the UV light that cures and builds the model.

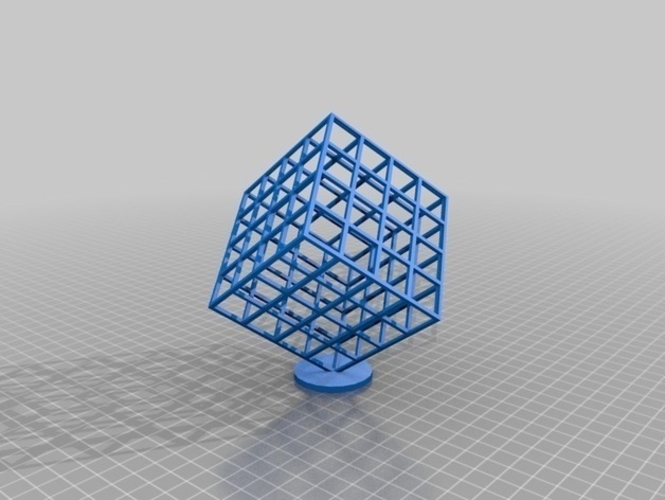
This is a rendering of what the Lattice Cube test model was intended to look like.
I also tried my hand initially at
photogrammetry before failing spectacularly using bad technique, bad lighting
and free software. The image below shows the image profile of my first attempt.
The idea was to capture the golden warrior figure in 3D and soon found out that
the photogrammetric program needs photos from points that require actually
moving around the object instead of just turning it as the background is in
part what allows the program to recognize the change in position between the
photos and therefore create an accurate 3D model. My initial creation rendered
the background into 3D based off of what the images showed but the golden model
ended up being a blob with no real definition.

I
learned soon, however, that the program can be fooled into thinking I was
moving around the object by placing it in a photo box on a lazy Susan. This
method allows the background to be indescribable to the program and the only
point of reference to create the 3D model is the model/artifact itself. This method also allows for even and easy
lighting as well as preventing the need to constantly move the camera into 40 to
50 new points around the model.


It is my goal in the coming days to
try this method out using my newly acquired photo box and lazy Susan and learn
to input these into Metashape while also printing the test models from FPAN. My
initial work in the coming week for Metashape will be small detail-oriented
models that I have lying around the house while I await the coming artifacts
next week.
No comments:
Post a Comment